Multi-point-inspection
Back to Info page |
Enter site. View index page |
Visit our Facebook page
This List has been reproduced by kind permission of PRACTICAL CARAVAN ( www.practicalcaravan.com)
Use this link to take you to the 32-point check list
THE EXTERIOR
1.
INTEGRITY OF THE FLOOR, SIDES & ROOF
Take a look along each sidewall, from end to end, searching for dents, bumps. These can be repaired but should lower the price. Avoid viewing the caravan when it’s raining as droplets of water can conseal minor blemishes on the flanks. Significant rippling in the side panels or movement in the
floor could point to delamination (this is when the van’s layers separate) it can be fixed with an injection of a special adhesive, but this is costly. Pay particular attention to the most walked-on areas in the van (e.g. the doorway and in front of the kitchen unit).
2.
>FRONT & REAR BODYWORK
Check for cracked and ’crazed’ panels or damage to the surfaces. Especially along joints
between the front/rear and the sidewalls of the caravan.
3.
GRAB HANDLES
Water can creep in behind insecure grab handles - the trapped moisture can eventually spread throughout the body
4.
ROAD LIGHTS, WIRING & REFLECTORS
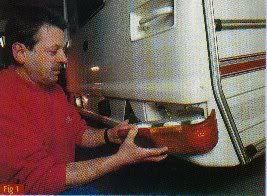 Check that all the road lights are in working order. Water can find it’s way in around the screwheads and seals, so look for signs of condensation as this can lead to dampness in the wall, behind the lights. the owner may even have drained water from the lens, so also look out for rusty bulb holders. {fig. 1}
5.
EXTERIOR LOCKS & HINGES
Hinges can sometimes bend, leading to a badly-hung door, or a twisted frame. Check that they’ve been well lubricated and ensure that all the lock catches work.
6.
WINDOWS & FITTINGS
Window catches can loosen over time and the stays can break - check that they’re in working order. Examine the seals for cracking and prise them up to check that the woodwork beneath is dry. On vans made from 1992 onwards, check that the CRiS numbers match up with those on the tourer’s chassis.
7.
ROOFLIGHTS
Ensure the rooflights still lift on their stays & check seals for water ingress.
8.
COUPLING HEAD & BREAKAWAY CABLE
 Check the hitch by trying to lift the van with it. If there is significant vertical movement of the head, it may need replacing. Check the gaiter for cracks and splits. Is the hitch head worn ? Check that it still locks onto a tow-ball. Push the coupling head in and check that it slides slowly back out - if not the damper may need changing. The breakaway cable should show no signs of fraying and the ring attachment beneath the drawbar shouldn’t appear stretched. {Fig. 2}
9.
JOCKEY WHEEL
If the jockey wheel’s action is stiff, it may simply need lubricating or it could point to warn bearings.
10.
HANDBRAKE OPERATION
Test the braking mechanism by drawing the van forward, then pushing it back. Listen for groan and creaks. It may mean the brakes are binding or that the overrun is not released when the caravan is reversed.
11.
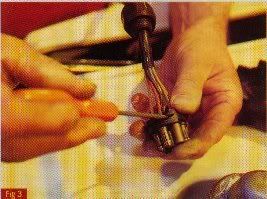
12N/12S 7 PIN PLUGS & CABLES
You mat find that the pins in the plug sockets are buckled, pinched or rusty. This will affect the connection. Also, make sure the cables arn’t frayed or split, which may mean a careless owner has let them drag along the road while towing. {fig. 3}
12.
CORNER STEADIES
These should wind up and down easily. If the spindle is bent they may raise and lower at the wrong angle, or be stiff to use.
13.
CHASSIS & CHASSIS TO BODY SECURITY
With your torch, look underneath the caravan for corrosion around the nuts that bolt the floor to the chassis. Look, too, for leaking gas & water pipes.
14.
SUSPENSION
Lopsided suspension often points to overloading or accident damage.
15.
TYRES/PRESSURES
Look for uneven tread wear on each tyre, including the spare, if fitted. With a tyre tread depth gauge Check that it’s more than 1.6mm across three-quarters of the tyre’s tread face and around its circumference.
16.
TORQUE & WHEEL NUTS
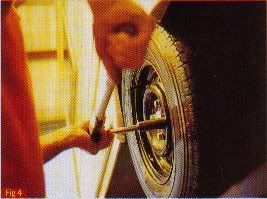 Look for rust around the wheel nuts. Check manufacturer’s torque specifications and adjust as necessary with a torque wrench.{fig. 4}
17.
HUB BEARINGS, BRAKES & BRAKE SHOES
On level ground, the brakes should engage after a couple of clicks of the lever. If not, they are worn, or esle need adjusting.
18.
OIL SEALS
Check for leaks in the seals on the back of the brake drums. (on older vans you may need special tools to remove the drum).
19.
BRAKE RODS & LINKAGES
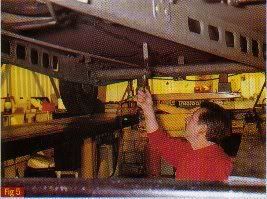
Look beneath the drawbar and check that there’s some (not excessive) play in the linkage, or the brakes may bind. Check that the linkages have been greased. {fig. 5}
INTERIOR
20.
DAMP TEST
Does the caravan smell musty? You can buy a special damp meter, but use a torch to check under seats and in corners of the wardrobe for signs of damp. Your nose is one the cheapest methods!
If the caravan is damp - avoid it like the plagues. There are hundreds of caravans to choose from - don’t think about buying a damp one!
21.
INTERNAL LIGHTS
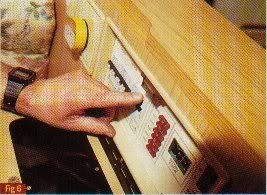 Switch on the caravan’s 12v system and try all the lights, then try running appliances off the battery. If the lights don’t work it could just be that a bulb or a fuse has blown. {fig. 6}
22.
MAINS 230v SYSTEM
Most dealers will agree to hook the caravan to mains electicity. Use test plug in the sockets to comfirm that the circuits are correctly wired. Dealers are required by law to do the job properly and certify it but there’s no such obligation on a private owner. test the appliances and the mains trip switch on the control panel
23.
GAS SYSTEM & GAS FLUES
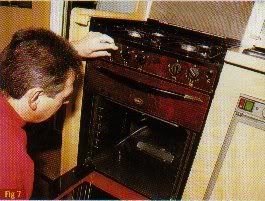
Check all gas appliances and check the condition of the gas lines within the caravanas as the rubber hose which links the bottles to the copper piping in the gas locker. Is the regulator appropriate to the type of gas you intend using (red for Propane, blue for Butane) Check that the hob flame burns blue and not red/orange as this can indicate an airlock or a leak somewhere in the system. {fig. 7}
24.
WATER PUMP, TAPS & WATER SYSTEM
Fill the fresh water container and, with mains electricity connected, switch on the water pump. Open a tap and check that the water runs freely.
Also check that the water heater (if fitted) works. With the caravan on level ground check the water drains away in the sink, basin and shower tray.
25.
ALL VENTS
Check all vents are in working order and clear from obstruction.
26.
WATER HEATER (If fitted)
Ensure that it works from both gas & 230v sources.
27.
SPACE HEATER
Check as above (point 26).
28.
REFRIGERATOR
Ensure the appliance (if fitted) works correctly on 230v AC, 12v DC and gas power sources. Check that the travel catch works - it stops the contents spilling when you’re on the road.
29.
HOB, GRILL & OVEN
A dirty oven can be a sign of a sloppy owner, so take a peek inside. Make sure the spark igniter works correctly.
30.
FURNITURE HINGES & STAYS
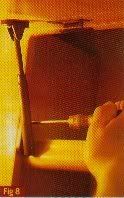 Make sure the overhead locker hinges & stays are in working order. You may find evidence of DIY work inside some lockers (e.g. crockery racks).A nice, neat fitting can point to a caring, past owner. {fig. 8}
31.
SMOKE ALARM & BATTERY (If fitted)
Easy to replace, but check it all the same
32.
BLINDS, FLYSCREENS (If fitted)
Constant use tends to weaken the return springs of blinds and flyscreens. These springs can be retensioned but if there is more serious damage, you should ask to have them replaced.
Top |
Back to Information Page |
32 Point Check List |
Enter site. View index page |
Visit our Facebook page
©2003
Clicreports.co.uk All Rights Reserved
Be advised that these reports and the contents of this site remain the property of the authors and should not be copied or reproduced without prior consent.
|